Composer Workflow logo with left white rounded rectangle wedge icon and wide-tracked text.
Type at least 3 letters to start searching

Please complete your purchase before

what I have to do after the purchase?

Well done, if you’ve made it this far it means you want to change and improve your website! Inform-Ai will help you with that!

Now, to complete the setup we need to connect Inform-AI to your website. This step is quite delicate because it’s where you grant access to your current posts and authorize Inform-AI to publish. For this reason, the connection is carried out manually by an operator using the data you provide. It may take 12–48 hours (any lost days can be recovered later in the queue).


Now we need two pieces of information to proceed: your website API and your website RestAPI base URL.

Below you’ll find the guide to help you understand how to get them. Once you have the data, just fill out the form and you’re done!

we need

What is an API and Why Do We Need It?

API stands for Application Programming Interface.
Think of it as a bridge that allows two different programs to talk to each other.

  • Your WordPress site is one program.

  • Inform-AI is another program.

The API acts like a messenger:

  • When the AI wants to publish a post, it tells the API: “Please create this new article.”

  • The API passes that request to WordPress.

  • WordPress checks if the request is allowed, and if yes, it creates the post.

This guide will show you how to install and configure a WordPress plugin, specifically Make Connector, even if you are not very familiar with WordPress.


Step 1: Access WordPress Admin

  1. Open your web browser.

  2. Go to your WordPress admin panel by typing: https://yourwebsite.com/wp-admin

  3. Log in using your WordPress username and password.


Step 2: Install the Plugin

  1. In the left-hand menu, look for Plugins.

  2. Click Add New.

  3. In the search bar at the top right, type:
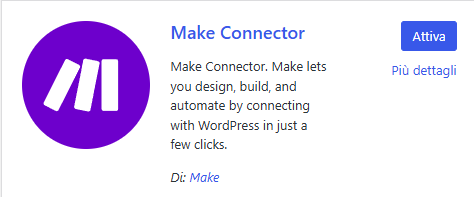
 Make Connector

  4. Look for the plugin in the results

  5. Click Install Now.

  6. After installation, click Activate if it doesn’t activate automatically.

  7. Once active, you will see a new icon appear in the left-hand menu, usually at the bottom (last icon).


Step 3: Copy Your API Key

  1. Inside the Make Connector settings, look for API Permissions or Access Control.
  2. Limit permissions to only what is necessary: Read posts, Create posts, Update posts. This ensures the AI cannot access sensitive parts of your site.
  3. click now on Reveal and copy the full code (very important)

Find Your WordPress REST API Base URL


The REST API Base URL is what allows external tools (like Make Connector) to communicate with your WordPress site.

Default Rule

The REST API Base URL is always:

 
https://yourwebsite.com/wp-json/
 

It is simply your site’s main URL + /wp-json/.


How to Check

Open a new browser tab.

Type your site URL followed by /wp-json/.

Example: 

https://my-wordpress-site.com/wp-json/
 

If everything is working, you will see a page full of JSON text (lots of brackets, quotes, and site info).